Now you’ve seen part one for the Instagram Ratio’s, now we need to get the best quality in the Images your exporting.
I am going to assume that you’ve already cropped your image to one of the 3 ratios already mentioned in the last Instagram based post.
I’ll go through Lightroom and Photoshop, but the same general settings could be used for any program you wish to use.
Lightroom
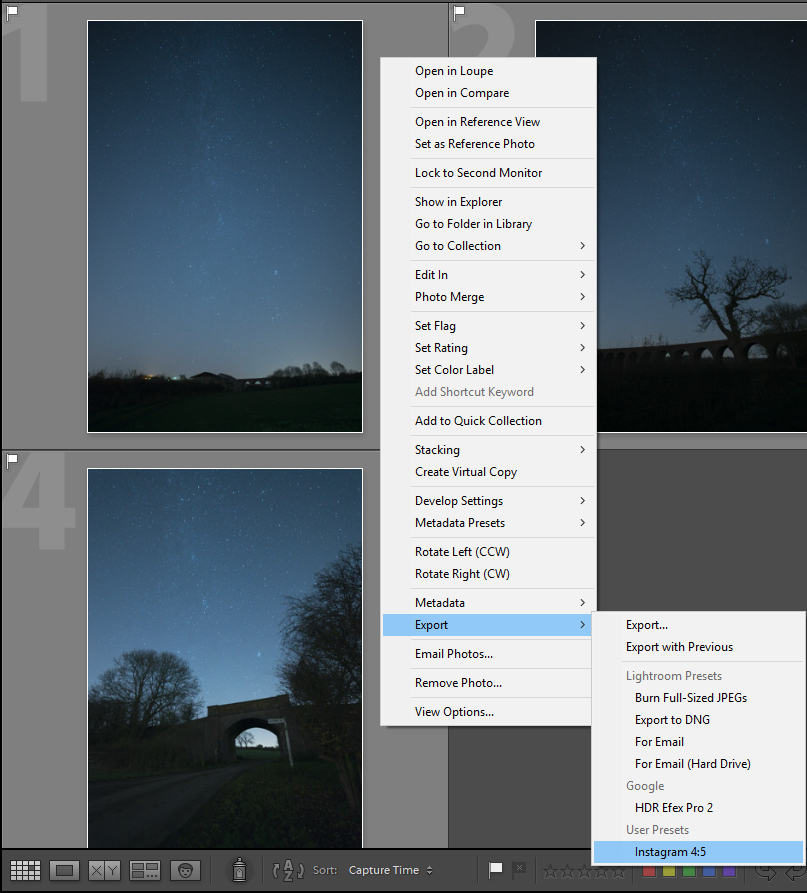
Select the photo you want to export in the library module. Click on the ‘Export’ button at the bottom right, or right click on the image and ‘Export’ > ‘Export…’.
You will see the export dialog box.
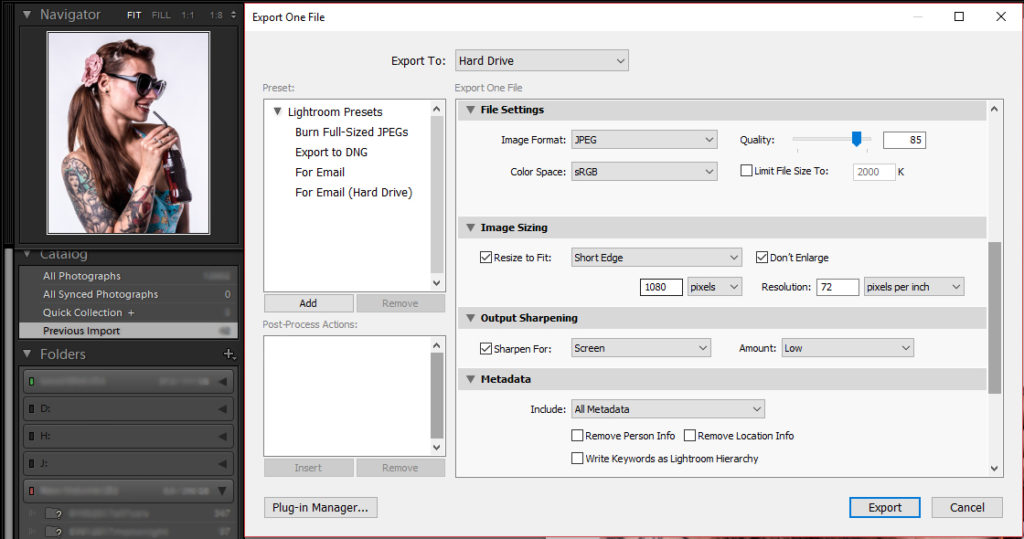
The Export Location and Filename are irrelevant to the image export quality, so you can set these to whatever you wish.
The File and Image Settings are where it’s all at.
Image Format: Jpeg
Color Space: sRGB. This is pretty much standard for web images. If you choose anything else it will be converted to sRGB anyway, but could change your output.
Quality: 85. Anything more, and your just making the file larger. Anything lower, and the quality will degrade.
There is no need to limit the file size.
Image Sizing.
Here we will change the image specifically for Instagram. If you don’t Instagram will do it for you. This could degrade your image. If you do it here, you can make sure everything is how you want it before upload.
Resize to Fit:
If you are exporting in the Landscape or Square Crop, Choose the Long Edge.
If you are exporting to Portrait, Choose the Short Edge.
Tick ‘Don’t Enlarge’.
Pixels:
Select 1080.
Resolution:
I usually just leave this at 72. It doesn’t really matter as we have specified the exact pixel size anyway.
Output Sharpening.
If you haven’t already applied your sharpening to the image, just Sharpen for Screen and choose Medium. Instagram is only ever going to viewed on a computer screen, so no need for anything more.
If you have already sharpened your image, choose Low in the amount field.
Metadata doesn’t matter, as it is not carried over to instagram.
Watermark: This is personal preference. If you want to add one, please do.
Now Export your image OR………..
Create a Preset. When you have set everything for your instagram output, save it as a preset, so you can just select and go, rather than putting everything in again. To do this, select ‘Add’ on the left hand side of the export dialog.
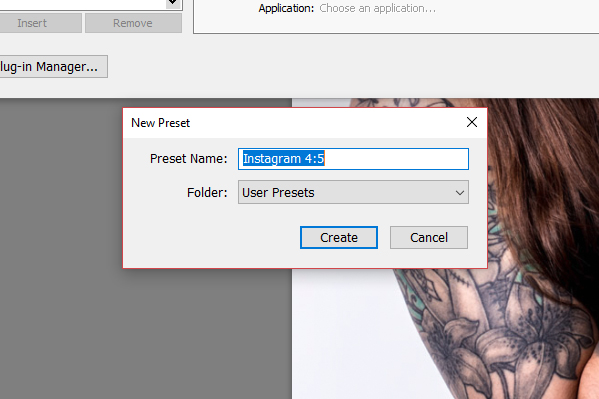
Name the preset and ‘Create’.
Now in the future, you can select all the images you have already set the ratio on, and right click ‘export’> ‘Your Preset’ and your done.
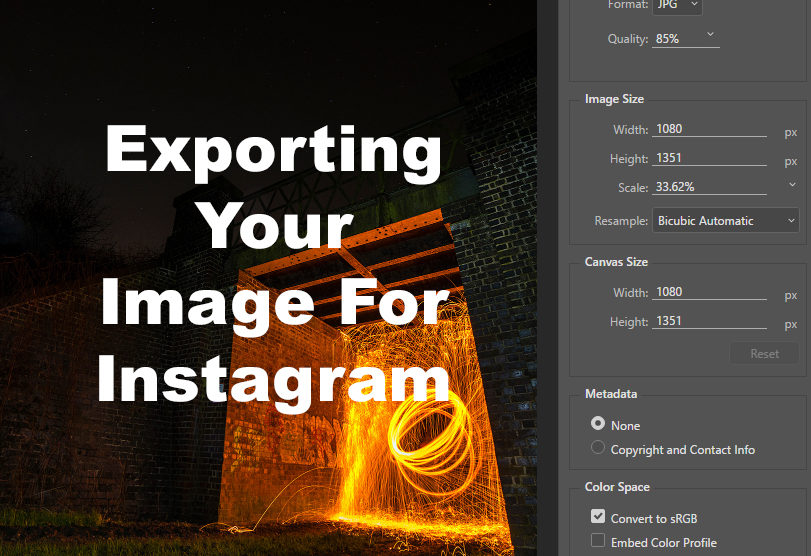
Photoshop
When you have cropped your photo to the right ratio go to ‘File’>’Export’>’Export As’

Pretty much the same thing as lightroom
Format: JPG
Quality: 85%
Image Size
Width: 1080 (For Portrait Ratio) for Other Ratios Height: 1080
This will automatically change the Opposite Side.
Resample: I leave it on Bicubic Automatic, but feel free to check the other options, to see if they are better for you.
Color Space: Convert to sRGB.
Now just Export.
This is ok for a single image.
That is pretty much it. There’s nothing really in depth about it, and it is really easy to do and setup.
I now have a store for Prints and anything else. Look at the top of the page and click on Shop.
If you want to email me for a custom order, or something not in the shop drop me an email.
As always, have fun, stay safe, and enjoy shooting.
Any suggestions for future blog posts, drop me an email. I will at some point be going into more detail on future posts.
you can see more of my work at
https://www.instagram.com/garethnormanlandscapes/
https://www.instagram.com/garethnormanportraits/
https://www.facebook.com/garethnormanlandscapes/
https://www.facebook.com/GarethNormanPhotography/
#instagram #export #howto #hintsandtips #guides #garethnormanphotography #leicesterphotographer