First Published June 29th 2018
Putting that mark on your photo makes a lot of difference for some.
I feel it’s like putting your stamp on something your proud of. And that’s exactly what it should be.
To make a simple watermark is easy. Just follow the details in this blog, and you’ll be away.
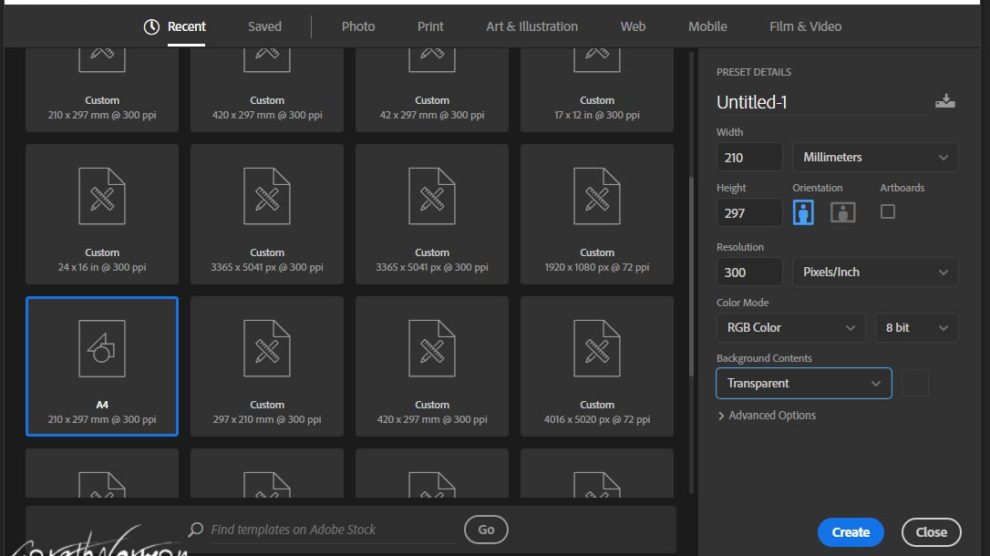
First open Photoshop and open a new document with the following parameters.

The main bit being the background contents. Set it to Transparent
As long as you have enough space to work and the background is transparent, click create.
Th easiest and simplest thing to do, is just use text. You can elaborate a lot at this point, but, i’ll just stick to the basics to get you going.
So select the Horizontal Type tool and create a text box on your document.

Type in whatever text you want. This is a very simple on, with a standard font, just to show you. The copyright symbol is created by pressing alt+0169.

Crop in on the text you’ve created with a nice even border.

Save the document in a location and name you remember. save it as a .PNG file which is available in the ‘Save as type: box’.

We will come back to this saved file for use in lightroom. For now i will continue with the photoshop method. Because i use both a lot, i like to make sure the signature is available in both locations.
Use Select>Color Range in the menu. it will default to selecting the coloured portion of your image (thanks to the transparency). Click OK.

You wil see the marching ants around your selection at this point.

Now go to Edit>Define Brush Preset. This will use your selection and create a brush. Name it something pretty discernable like MYSIGNATURE2018 or something like that.

That’s it for photoshop.
Next time you finish an image, go to your brush tool, select your new preset, select the size, and select whatever colour you want and click on the image. Your signature will be there.
It’s the same concept with images, or your own text. If you want scan in your own physical signature to a jpg file and use that.
FOR LIGHTROOM
For lightroom lets go back to the file you saved earlier. The lovely PNG file with a transparent background.
Open up lightroom and go to Edit>Watermark Editor and you’ll see the below.
In Image Options select Choose…

Select your awesome watermark that you saved earlier and click choose.

You can then amend exactly where you want the watermark and the size. Have a play with the options to get it to your taste.

To save this for future use, Select ‘Custom’ at the top left and select ‘Save Current Settings in a new preset’. Choose a name for the preset and that’s it.

When you now do an export from Lightroom, you can select your preset and it will appy itself to every image in your export.
That is everything really.
If you have any questions whatsoever, send me a quick message and i’ll see what i can do.
I now have a store for Prints and anything else. Look at the top of the page and click on Shop. If you want to email me for a custom order, or something not in the shop drop me an email.
Finally, have fun and stay safe, and enjoy shooting.
Any suggestions for future blog posts, drop me an email. I will at some point be going into more detail on future posts.
you can see more of my work at
#garethnormanphotography #leicesterphotographer #hardworkpaysoff #pushyourlimits #followyourpassions #nikon #sigma #samyang #bestphotography
About Me
I’m Gareth, a 38 year old IT contractor, Photographer, Eternal Optimist and Blogger. I have been behind a camera for about 4 years now and love shooting the stars, and anything else for that matter. Learning is the main aim for me.
I am a family man, and strive to be the best i can be in all fields that i put my mind and heart to.
