First Published February 8th 2018
These points generally apply to my own experiences around the Midlands in the UK. Unfortunately we are surrounded by light pollution, so shooting the milky way is difficult at best, but i do the best with what we have.
Here are a few tips, statements and truths to get the best out of your trip out in the UK. Hopefully, if you can get good shots of the milkyway, out of season in these conditions, you’ll kill it at a proper dark sky site.
1. Your not going to get the most amazingingly clear shots of the core.
There are some outright breathtaking shots on the internet but to get those sort of shots you will need to get to a dark sky site at a certain time of year. Also in the UK there is a limit to how much of the core is viewable. If someone wants to fund a trip to New Zealand or Australia i am game!
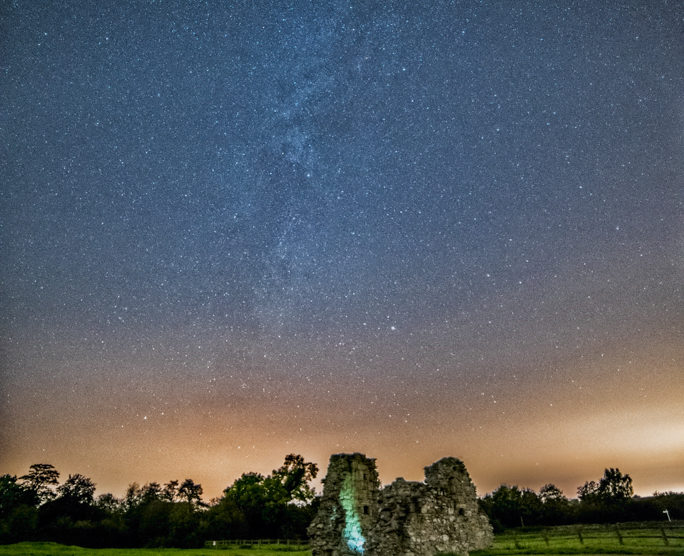
This is a shot of the Northern Cross in the midst of the Milky Way.
This is from a relatively dark site in Leicestershire, with unfortunately limited access.
Probably the best your going to get over the winter period from the UK, as the core is below the horizon line.
f2.8, 30 Seconds, ISO800
2. Push your ISO to it’s limit, or not.
Depends on how much post production you want to do, and what outcome you want to achieve.
There are a couple of schools of thought about this. I think it depends on what you want your final image to be. If you push your ISO and Expose to the Right your photo, out of the camera will be completely blown out. It takes a lot of work to bring it back.
If your lightpainting the foreground, and just want a nice hint of the milkyway keep your ISO lower.
It’s one of those things you get a feel for on the night and when you do it a bit more.
F2.8, ISO8000, 30 Seconds. Blown right out. Took in a relatively good spot but the light pollution is still pretty massive. A lot of work to bring out the details.
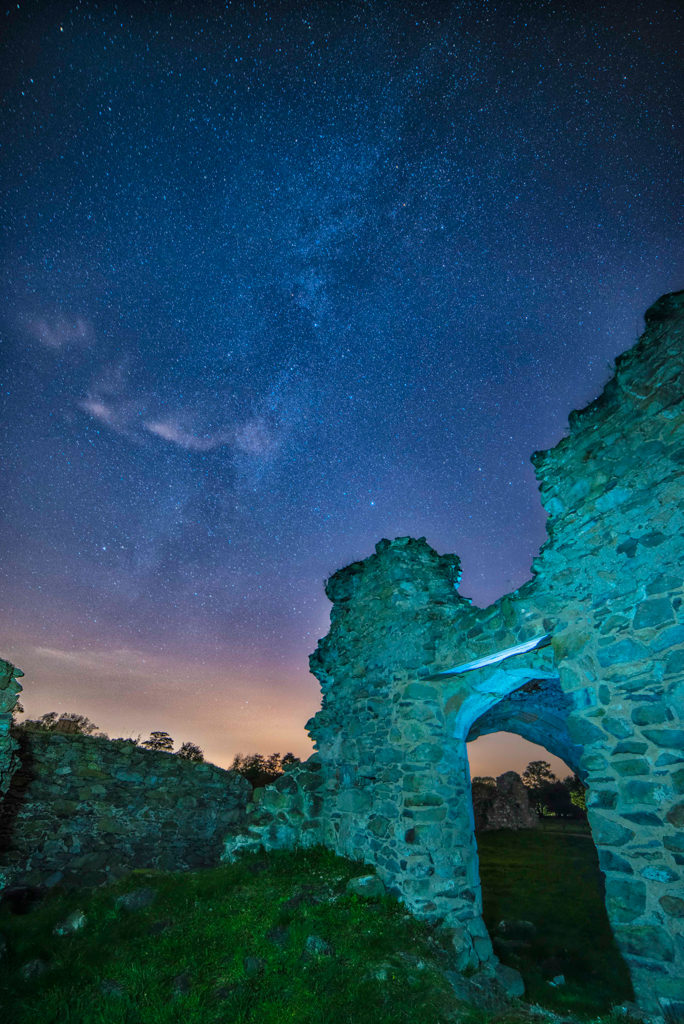
F2.8, 30 Seconds, ISO800
From another quite good spot.
Even in full moonlight you can get a hint of the milky ways existence.
I do like taking shots in moonlight , as it gives the foreground a huge lift. But i would prefer it completely dark sky and lightpaint. I will do a return visit here with better conditions to see what difference it makes.
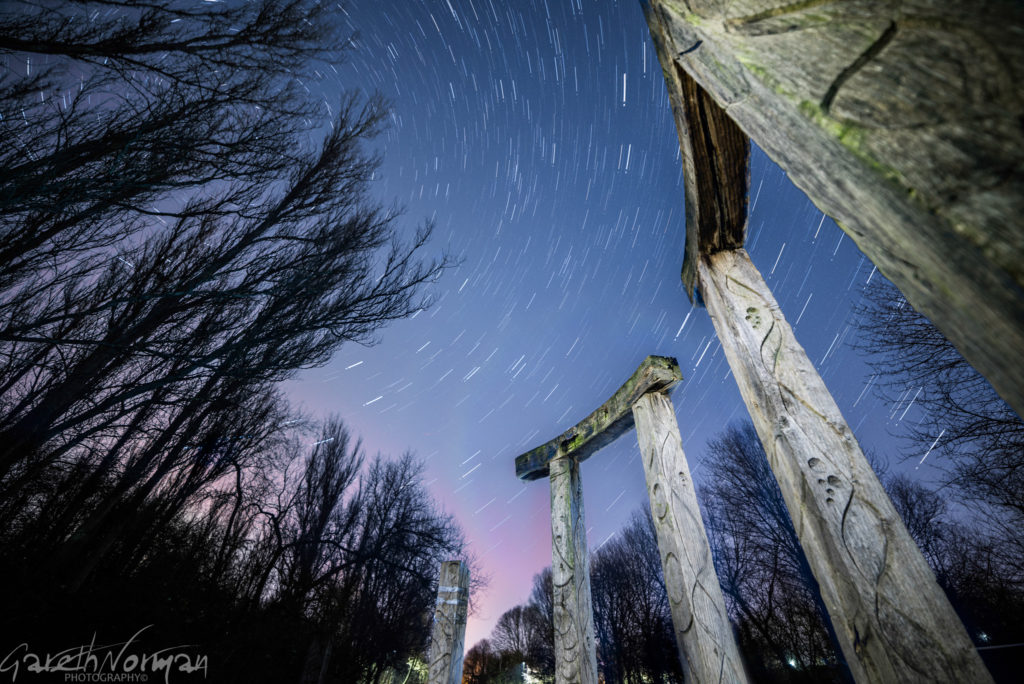
Experiment with your shots. When you know you can get a good crack at the milkyway, try some different angles and foreground elements.
3. finding a good location that’s guarded from ambient city lights.
Goes without saying really, the further away from the city the better, unless of course there is an extended powercut.
If you go outside into your street and look up at night, your usually squinting past the streetlights. Put your hand up in front of the streetlight, to stop the stray light getting to your eyes, you can see more of the stars. Same concept with your lens.
If you can find a place that blocks the ambient lights, then you’ll get more of the light you want entering your camera and sensor.
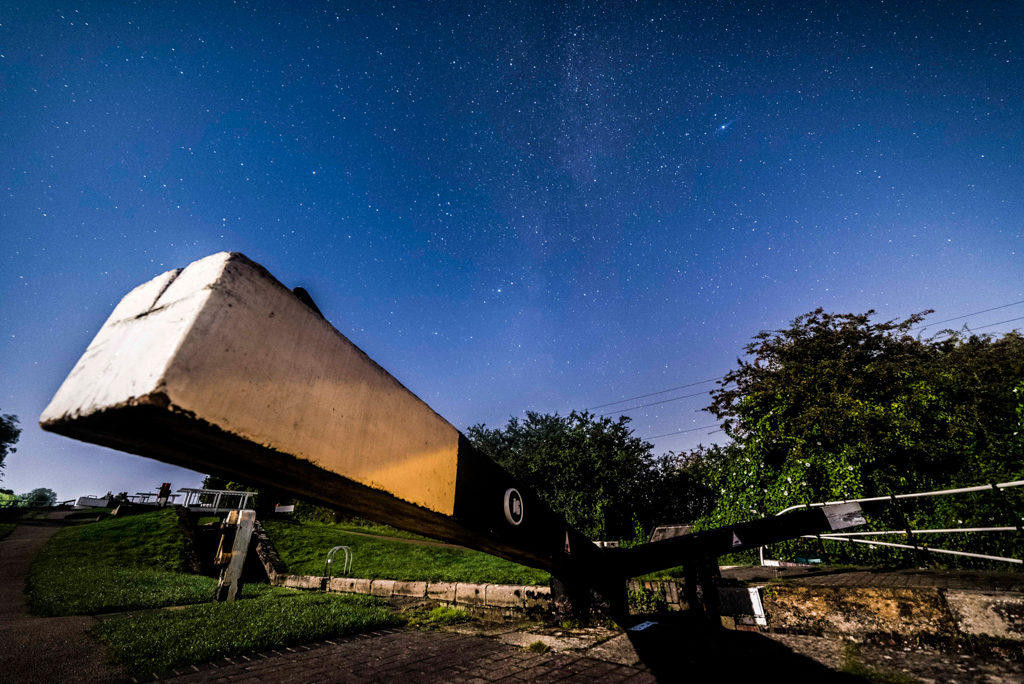
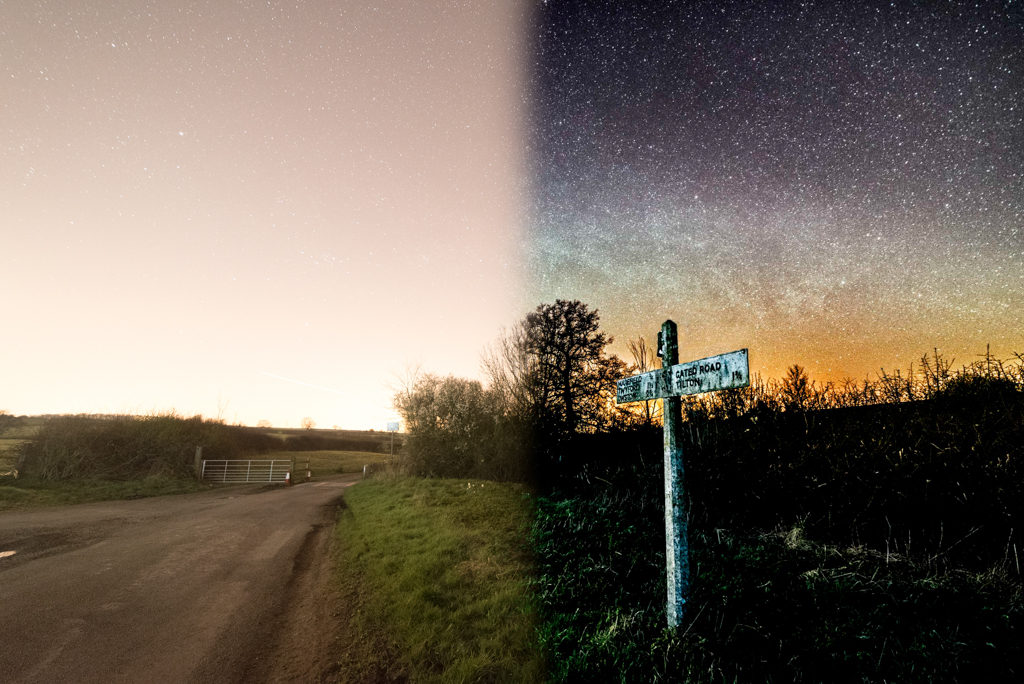
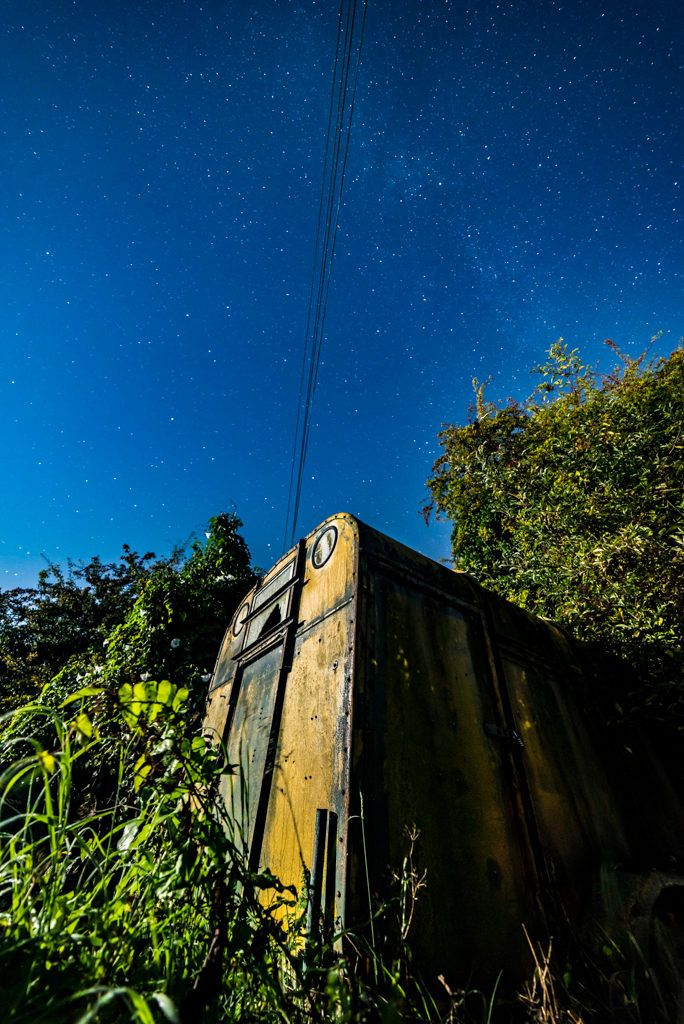
Not my favourite shot, but you can see where the light is coming in from the left hand side. Keep an eye on where your shadows lay as well when taking the shot. Milky Way, Full Moonlight with the Andromeda Galaxy looking very pretty at the top right. f2.8, 20 Seconds, ISO6400.
This was done the same night as the shot of the horsebox. Because of the different ambient conditions you can play with your settings to get what you feel is the best out of it.
4. Don’t be too concerned about getting the milky way shot.
It’s not the end of the world. Sometimes conditions, timing and clouds just conspire against you. If that happens, just change your game up and go for atmospheric cloud/starscapes, do some lightpainting, or just go for a pint.
The clouds rolled in this night for a good couple of hours, but looking at the patterns they were making, i thought it would make a great shot.
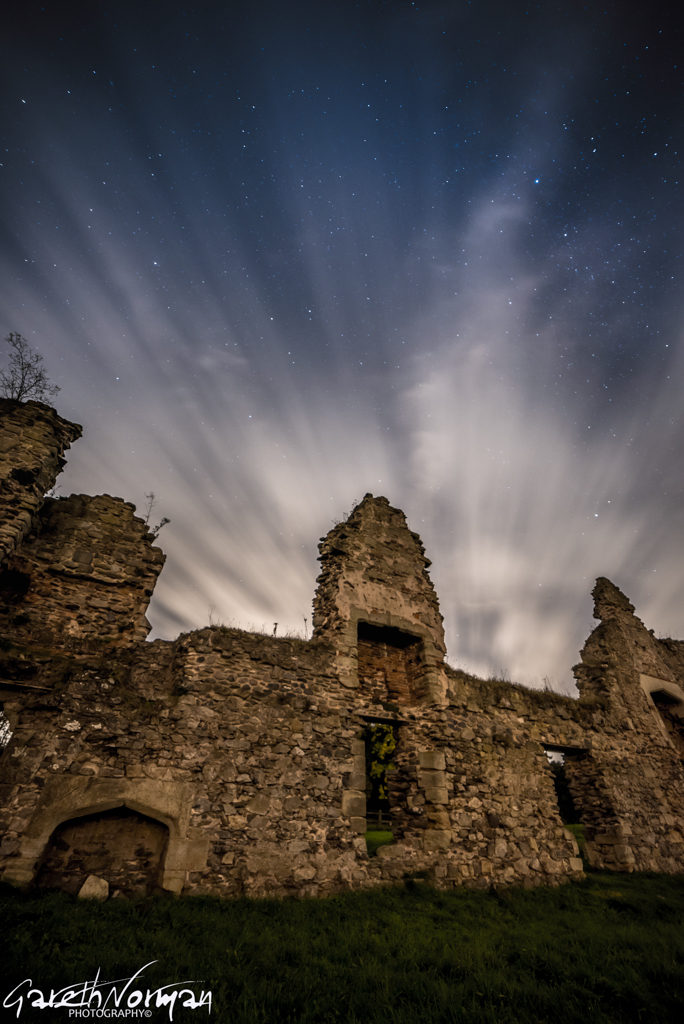
f2.8, 30 Seconds, ISO800
Pretty much straight out of the camera.
On this night the sky did clear about 10pm and was fantastic till around 2am.
If it is a complete washout/cloudout, think about the next attempt. Where it should be, timings, milky way position, everything. Plan ahead as much as possible.
5.Know your night sky.
This just makes things so much easier. If your phone dies, or your apps are just not playing ball, at least when you look up, you know what you are looking for.
The main one’s i like to remember for direction and where the milky way will fall are,
The Plough. You will be able to find the north star or Polaris by looking for this constellation.
the Northern Cross. Depending on the time of year, this is slap bang in the middle of the milky way. Centering on Cygnus, and right next to the North America Nebula, it’s hard to miss.
Orion. Runs right next to the Milky Way. Look to the top left of orion and you will see a bright red star. This is Betelgeuse and is just on the side of the visible milkyway.
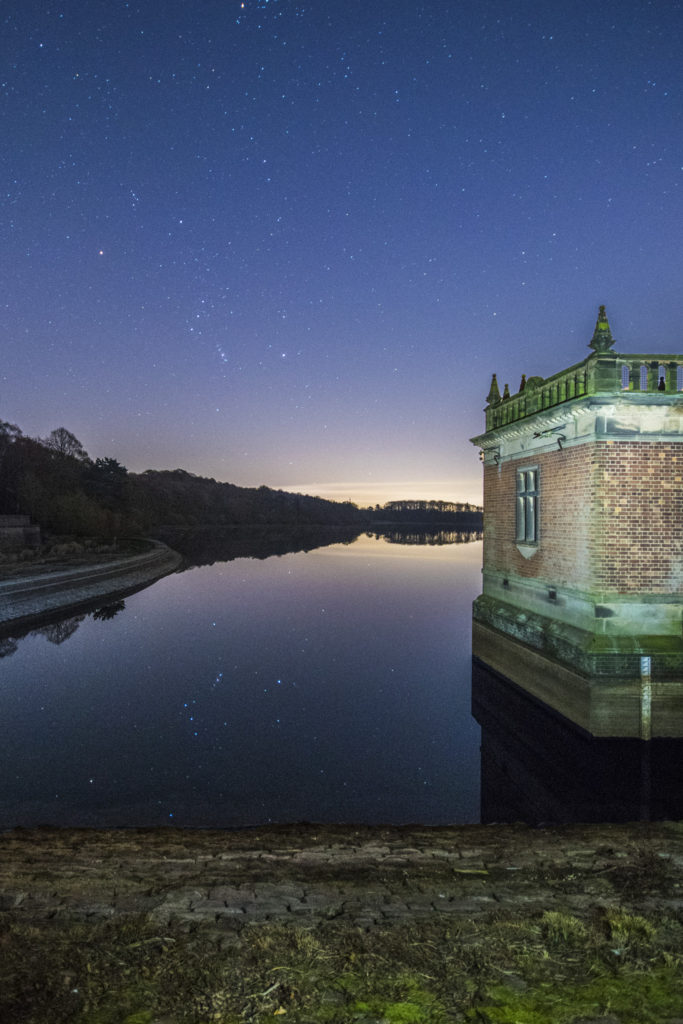
Orion from Swithland Reservoir. Massive light pollution, and taken back when i was less experienced.
D5300 Crop Sensored DSLR
10-20mm Simga Lens
F4
20 Seconds
ISO1600
Casseopia. Look North East and you will see a small ‘W’ shaped constellation in the sky. This is another one which points to where the milky way will run through the sky.
I know programs like Stellarium Mobile, and Photopills ( Awesome bit of kit) help a lot, but nothing can beat just having the experience of knowing where to look.
I will get some shots of these fantastic constellations onto their own blog and do them a lot more justice. There is a lot more than just the milky way up there.
6.If Possible, Avoid Moonlight.
Check when the moon is full and when it rises as well. If your in a full moon situation, but it doesn’t rise till 1am, then get the sky shots you want, and when the moon provides that gorgeous glow across the landscape, get your foreground shots in. Take advantage if you can, but the best is No Moonlight for the best shots of the milkyway. If it is not moonlit, the options are a bit of lightpainting, or doing a very long exposure at a lower iso to lower the noise ratio. I’ve done 5 minute shots before of the foreground.
7. After midnight in Rural Areas.
In a large amount of Rural areas in the UK, the streetlights are now switched off after midnight.
This is a frankly awesome situation. The light pollution causes more problems than just not being able to see the stars, and the less there is the better. At some point this year a jaunt to Wales is in order, as they have protected dark sky sites.
8. Just enjoy the majesty of our wonderful night skies.
Just go out, wrap up warm and just look at all the different bits of the sky. There are some very interesting sights. At some times of year, meteor showers, but i can’t remember a time when i didn’t see at least one on a night out. just take it all in. I do find it incredibly soothing being under the stars, and certainly helps me feel something incredibly humbling and eye opening.
I now have a store for Prints and anything else. Look at the top of the page and click on Shop. If you want to email me for a custom order, or something not in the shop drop me an email.
Finally, have fun and stay safe, and enjoy shooting.
Any suggestions for future blog posts, drop me an email. I will at some point be going into more detail on future posts.
you can see more of my work at
https://www.instagram.com/garethnormanlandscapes/
https://www.instagram.com/garethnormanportraits/
https://www.facebook.com/garethnormanlandscapes/
https://www.facebook.com/GarethNormanPhotography/
#highiso #starscapes #landscapes #garethnormanphotography #leicesterphotographer #leicestershire #hardworkpaysoff #countryside #longexposure #pushyourlimits #followyourpassions #nikon #sigma #samyang #starchasers #stars #ruins #oldbuildings #milkyway #constellations #bestphotography